Marijuana Grow Guide
Discover the ultimate marijuana grow guide with expert tips on autoflowers vs. photoperiods, training techniques, curing methods, and preventing bud rot. Perfect for beginners and seasoned growers looking to maximize their cannabis yields!

Essential Tips for Successful Marijuana Cultivation
Welcome to the GreenGrowVibes guide to marijuana cultivation! Whether you’re a first-time grower or a seasoned hand looking to refine your craft, this marijuana grow guide will walk you through the essentials.
Cultivating top-tier cannabis isn’t just about planting seeds and hoping for the best—it’s about understanding the plant, optimizing its environment, and fine-tuning your techniques to maximize yield and quality.
Let’s dig in.
Understanding the Basics of Cannabis Cultivation
The Life Cycle of Cannabis Plants
Before you dive in, you need to grasp the basics of growing pot.
It seems like everyone, myself included, is always in a rush to figure out how to grow weed quick. But, the time it takes growing weed from start to finish depends entirely on the cultivar and your growing style.
Cannabis grows in distinct stages, each requiring specific care:
- Germination (3-10 days) – Your seeds sprout, marking the start of their journey.
- Seedling Stage (2-3 weeks) – Small leaves develop, requiring gentle care.
- Vegetative Stage (3-16 weeks) – Rapid growth, lots of light, and strong nutrient support.
- Flowering Stage (8-12 weeks) – Bud production begins, requiring a 12/12 light cycle.
- Harvesting – Time to collect, dry, and cure your buds for maximum flavor and potency.
Mastering these stages ensures a healthy, high-yielding cannabis garden. From start to finish, the entire process typically takes anywhere from three to six months, depending on the strain and growing conditions.
This step by step cannabis grow guide provides a structured approach, while the growing pot step by step method helps refine each stage for optimal results.
Autoflower vs. Photoperiod: Choosing the Right Type for Your Grow
When selecting cannabis seeds, one of the most important decisions is whether to grow autoflower or photoperiod plants. Each type has its benefits and challenges, making them suitable for different grower needs.
What Are Autoflowering Plants?
Autoflowering cannabis plants transition from the vegetative stage to the flowering stage automatically, based on age rather than light cycles. They originate from the Cannabis ruderalis species, which adapted to short summers with minimal light changes.
Pros of Autoflowers:
- Faster harvests – Typically ready in 8-12 weeks from seed.
- No need to adjust light cycles – Autoflowers bloom automatically.
- Compact size – Ideal for small grow spaces and stealth grows.
- Resilient genetics – More resistant to pests and diseases.
Cons of Autoflowers:
- Smaller yields – Due to their short lifecycle, they produce less than photoperiod plants.
- Limited training options – High-stress training can stunt growth.
- Fixed timeline – No way to extend the vegetative phase for larger plants.
What Are Photoperiod Plants?
Photoperiod cannabis plants require a change in light cycles to trigger flowering. Indoors, growers must switch from 18/6 (light/dark hours) to 12/12 to induce bud production. Outdoors, they flower naturally as days shorten in late summer.
Pros of Photoperiod Plants:
- Higher yields – Can grow larger with longer vegetative periods.
- More training flexibility – Suitable for topping, low-stress training (LST), and screen of green (ScrOG) techniques.
- Clone-friendly – You can take cuttings to maintain genetics over multiple grows.
Cons of Photoperiod Plants:
- Longer grow time – Takes 4-6 months from seed to harvest.
- Light cycle dependency – Must maintain strict light schedules indoors.
- More space required – Can grow large and require pruning and training.
Choosing the Right Type for You
- Beginners: Autoflowers are easier to manage and grow faster, making them ideal for first-time growers.
- Yield-focused growers: Photoperiod strains provide larger harvests with proper care and training.
- Limited space & stealth grows: Autoflowers' smaller size makes them a great choice.
- Controlled indoor environments: Photoperiod plants allow more customization for advanced growers.
No matter which type you choose, ensuring proper nutrients, lighting, and environment is key to maximizing your results!
ILGM: A Trusted Seed Bank for Growers
One of the best parts of my growing journey has been discovering ILGM (I Love Growing Marijuana). This seed bank has been a game-changer for me, offering high-quality genetics and one of the best guarantees in the industry.
100% Germination Guarantee
I couldn’t be happier with ILGM’s 100% germination guarantee. Knowing that every seed I purchase is backed by this policy gives me confidence in my grow. If a seed doesn’t sprout, they’ll replace it—no hassle, no stress. It’s rare to find such a customer-focused company in the cannabis industry.

Why I Choose ILGM
- Top-Tier Genetics – ILGM offers a wide selection of autoflowers, photoperiod strains, and high-CBD varieties.
- Fast & Discreet Shipping – Orders arrive quickly and are packaged discreetly for peace of mind.
- Beginner-Friendly Resources – ILGM provides detailed grow guides, strain reviews, and community forums to support growers of all levels.
For anyone looking for a reliable and trustworthy seed bank, ILGM has proven to be my go-to choice. Their commitment to quality and customer satisfaction makes them a standout in the cannabis growing community.

Setting the Foundation: Germination & Seedling Care
Germination: The First Step to a Thriving Grow
Germination is the make-or-break moment. Here’s how to ensure a strong start:
- Paper Towel Method: Place seeds between damp paper towels, keep them warm (70-85°F), and wait for them to sprout.
- Direct Soil Method: Plant seeds ¼ inch deep in moist, warm soil.
- Jiffy Pellets or Rockwool: Great for hydroponics and soil grows alike.
Pro Tip: Don’t drown your seeds! They need moisture, not a swamp.
When you’re ready, here is a detailed guide on how to germinate weed seeds.
Navigating the Seedling Stage
Once your seeds sprout, they enter the fragile seedling stage. To keep them healthy:
- Use a high-quality light (18-24 hours a day).
- Keep temperatures between 70-80°F.
- Maintain humidity at 65-70%.
- Water sparingly—overwatering leads to root rot!
Healthy seedlings should develop their first set of true leaves within a few days. This is a crucial part of how to take care of a marijuana plant, how to take care of weed plants, and how to care for marijuanas plants in their early stages.
Some growers in the cannabis community avoid Jiffy Pellets because they can hold too much moisture, leading to damping-off or root rot. Others find the mesh netting restricts root growth unless manually removed. Additionally, sustainability concerns push some toward alternatives like coco coir plugs or rapid rooters.
That said, each grower has their own preference—if using Jiffy Pellets, monitor moisture levels and ensure proper drainage to prevent issues.
Vegetative Growth: The Foundation of Big Yields
The vegetative stage is when your plants bulk up, setting the stage for big buds later.
Key Success Factors:
- Light: At least 18 hours of light per day (more is fine).
- Nutrients: High nitrogen (N) for strong leaf and root growth.
- Training: Topping and Low-Stress Training (LST)
Training your cannabis plants is an essential technique to improve yields, manage plant height, and maximize light exposure. Two of the most effective methods are topping and low-stress training (LST).
Topping
Topping involves cutting off the main stem of a young cannabis plant to encourage multiple colas (main bud sites) rather than a single dominant one. This promotes bushier growth and increases potential yields. Here’s how to do it:
- Wait until the plant has at least four to six nodes before topping.
- Using sterile scissors, cut the main stem just above the third or fourth node.
- Allow the plant time to recover and watch for new growth from lower branches, which will develop into multiple colas.
- Topping can be done multiple times during the vegetative stage but should stop before flowering begins.
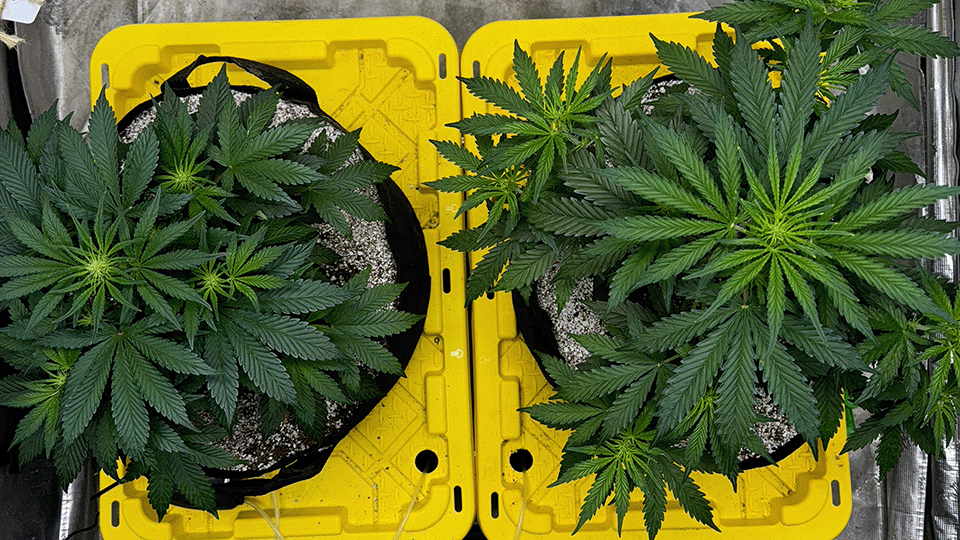
Low-Stress Training (LST)
LST is a gentle method that involves bending and securing branches to create an even canopy, ensuring all bud sites receive adequate light. Steps include:
- Start early in the vegetative stage when stems are still flexible.
- Use soft plant ties or coated wire to gently bend the main stem and side branches outward.
- Secure branches to the pot rim or stakes to keep them in place.
- Adjust and reposition ties as needed to encourage outward growth without breaking branches.
LST can be combined with topping for maximum yield optimization. Unlike topping, LST doesn’t involve cutting the plant, making it an excellent method for autoflowers, which have a shorter vegetative period and may not have time to recover from high-stress techniques.
By using these training techniques, growers can enhance light penetration, improve airflow, and maximize yields without increasing plant count.
- Topping, low-stress training (LST), and pruning encourage bushier plants with more bud sites.
- Airflow: Fans keep fresh air moving and prevent mold.
A strong vegetative stage = hefty yields come harvest time. If you're looking for pot cultivation tips, mmj growing tips, and basic weed grow strategies, this stage is all about giving your plants the right start.
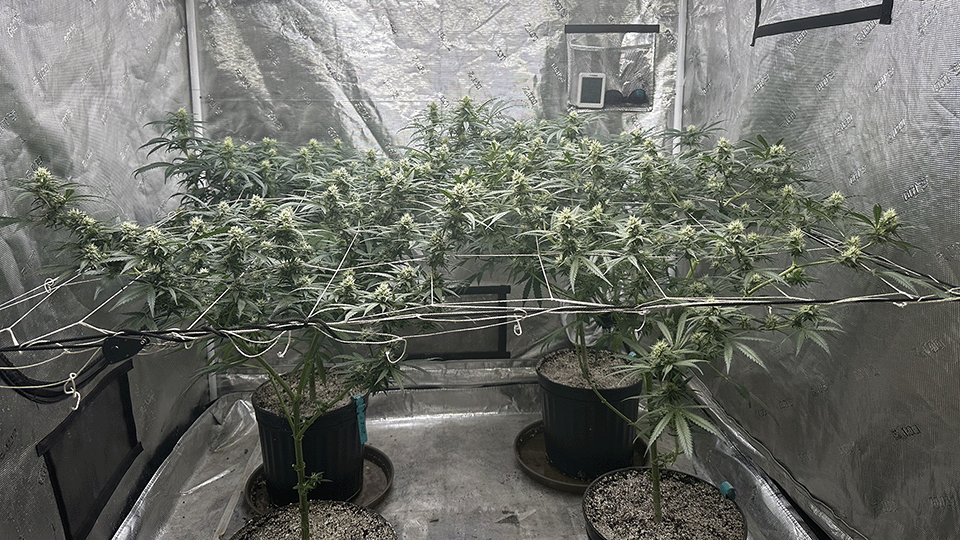
Flowering: When the Magic Happens
Once you flip your light cycle to 12 hours on, 12 hours off, flowering begins. This is when you really dial in your setup:
- Humidity: Keep it 40-50% to prevent mold.
- Nutrients: Shift to low nitrogen, high phosphorus & potassium.
- Pest Control: Aphids, spider mites, and powdery mildew can wreck your crop. Use beneficial insects, or very minimal organic sprays to keep them away.
Your plants will stretch during early flowering—be ready to adjust lighting height and support heavy branches. These weed growing advice and pot growers guide tips will help you get the best out of your plants.
Avoiding Sprays During Flowering: Protecting Your Buds
Using foliar sprays or pesticides during the flowering stage can have serious consequences on your final product. While foliar feeding and pest control sprays can be beneficial during the vegetative stage, applying them to flowering cannabis plants—especially toward the end—poses risks.
Why You Should Avoid Sprays in Flowering
- Residue on Buds – Sprays can leave unwanted chemicals or organic residues that affect flavor, aroma, and overall safety.
- Mold & Mildew Risk – Excess moisture on dense buds can create an ideal environment for mold, including botrytis (bud rot).
- Harsh Smoke & Contamination – Even organic sprays can alter the terpene profile, making the smoke harsher or potentially harmful when inhaled.
Alternative Pest & Disease Prevention Methods
If pests or diseases become an issue during flowering, consider these safer alternatives:
- Beneficial insects – Ladybugs, predatory mites, and lacewings can help control common pests like aphids and spider mites.
- Neem oil before flowering – If using neem oil, apply it strictly in the vegetative stage to avoid lingering residues.
- Proper airflow & humidity control – Keeping air moving and humidity low prevents mold and reduces the risk of infestations.
By avoiding sprays in late flowering, you protect your buds' purity, potency, and overall quality while ensuring a clean and smooth final product.
Air Movement: Preventing Bud Rot and Enhancing Plant Health
Proper air movement is crucial for maintaining healthy cannabis plants and preventing serious issues like bud rot (botrytis). Without adequate airflow, humidity can build up around the dense flowers, creating the perfect conditions for mold and mildew.
Why Air Circulation Matters
- Prevents Bud Rot – Stagnant, humid air can lead to mold growth inside the dense colas of flowering cannabis plants.
- Strengthens Stems – A light breeze encourages stronger branches, helping plants support heavier buds.
- Regulates Temperature & Humidity – Proper airflow reduces hot spots and keeps moisture levels balanced.
- Discourages Pests – Many pests, like spider mites, thrive in still air environments.
How to Improve Air Circulation
- Use Oscillating Fans – Place fans at canopy level and near the base to ensure full coverage.
- Exhaust & Intake Systems – For indoor grows, proper ventilation helps remove excess heat and humidity.
- Prune Dense Foliage – Remove excess leaves that block airflow to the lower branches and buds.
- Maintain Proper Spacing – Avoid overcrowding plants, which can trap humidity.
By ensuring continuous air movement throughout your grow space, you’ll significantly reduce the risk of bud rot and other moisture-related diseases, leading to healthier, more resilient plants with maximum yields.
Harvesting, Drying & Curing: The Final Stretch
Knowing When to Harvest
Harvest at the right time by checking trichomes:
- Clear = Too early
- Milky white = Peak THC levels
- Amber = More relaxing, sedative effects
Proper Drying & Curing for Potency
- Trim and Hang – Cut branches and hang them upside-down in a dark, ventilated room (60-70°F, 50-60% humidity).
- Slow Drying – Take 7-14 days until stems snap instead of bending.
- Curing in Jars – Store buds in airtight glass jars, burping them daily for the first week.
Patience here pays off in smooth smoke and enhanced potency. Curing allows moisture to distribute evenly, preventing harshness while enhancing the terpene profile for better flavor and aroma.
It also helps break down chlorophyll, leading to a smoother smoking experience and maximizing THC retention. Proper caring for cannabis plants, caring for an cannabis, and growing cannabis 101 in this stage ensures a great final product.
Jars, Bags, and Burpers: Choosing the Right Curing Method
Curing is a critical step that enhances the flavor, potency, and smoothness of your buds. There are several effective ways to cure cannabis, each with its pros and cons.
Mason Jar Curing
Mason jars are the traditional method for curing cannabis. They provide an airtight environment that allows buds to slowly release moisture while preserving terpenes and cannabinoids.
- How to Cure in Jars:
- Fill each jar about ¾ full to allow air circulation.
- Store in a cool, dark place at around 60-65% humidity.
- Open (burp) jars once or twice daily for the first week to release excess moisture, then gradually reduce to every few days.
- Pros: Excellent terpene preservation, easy to monitor humidity.
- Cons: Requires frequent burping, risk of mold if humidity gets too high.
Humidity-Controlled Curing Bags
Humidity bags, like Grove Bags or Boveda packs, simplify the curing process by maintaining an optimal moisture balance without daily burping.
- How to Cure in Bags:
- Place dried buds in humidity-controlled bags.
- Store in a cool, dark place.
- No need to open daily, as the bags regulate moisture.
- Pros: Less maintenance, built-in humidity control, preserves terpenes.
- Cons: Can be more expensive, limited size options.
Automated Burping Devices
For growers looking to streamline curing, automated burping jars or containers offer a high-tech solution. These devices regulate airflow and humidity levels without manual burping.
- How Automated Curing Works:
- Place buds in specialized curing containers with built-in air vents.
- Set humidity parameters (most devices maintain 60-65% RH automatically).
- The system releases trapped gases at scheduled intervals.
- Pros: Hands-free curing, reduces risk of mold or overdrying, precise humidity control.
- Cons: Higher initial cost, less accessible for small-scale growers.
Choosing the Right Method
- For traditionalists: Mason jars offer full control and excellent preservation.
- For convenience seekers: Humidity bags simplify the process with fewer maintenance steps.
- For automation lovers: Burping devices handle everything for you with precision.
No matter which method you choose, proper curing ensures better flavor, potency, and a smoother smoking experience!
Final Thoughts
Growing top-quality cannabis takes patience, knowledge, and dedication—but the rewards are worth every minute. Whether you’re growing for personal use, medicinal benefits, or commercially, applying these step by step grow weed, growing marijuana 101, and growing pot 101 tips will set you up for success.
Now, get growing and enjoy the process! 🌱🔥